Finding and fixing a leak before it leads to a long list of repair, refinishing and replacement tasks can save you alot of headaches. To avoid taking that route, it’s always best to do the below.
Locating The Leak
The first step to successfully fixing any caravan leak is to trace the source of water seepage. Leaky windows are quite easy to spot, but leaky roofs tend to sneak up on you. A caravan roof isn’t always perfectly horizontal, either due to its construction or because the caravan isn’t parked on level ground. As such, a caravan roof leak often makes its first appearance in the form of a trickle of water quite far away from the actual source. Also, speaking of the source itself, something as small as an exposed screw hole can be the culprit. If your caravan has had some time to dry out, locating a breach as tiny as this can be quite a task.
Relatively obvious leaks can be traced right up to their source from the inside of your caravan, because they’ll probably have left some tell-tale signs along the walls or ceiling. Minor leaks will need to be traced from the exterior. You will need to first remove or cover any valuables or expensive fixtures in your caravan. Use a sturdy ladder to make your way to the caravan’s roof and a spirit level to find out the direction in which the roof slopes. Start by spraying or pouring small quantities of water on the roof, and get someone to prompt you the moment the water enters the caravan.
.jpg)
Knowing Which Sealant To Use
A big part of successfully sealing any leaks in your caravan involves choosing the right sealant for the job. While applying sealant to a point of leakage, parameters you should consider include the effectiveness of the sealing job, as well as the duration through which the sealant will remain effective. Let’s take a quick look at some common sealants and what they can do for your leaking caravan:
Butyl mastic sealants, or caulking compounds, have a long history of use in fixing leaks. Basic, inexpensive and paintable, these sealants are effective in short-term applications. The outermost layer of the sealant hardens on exposure to air, providing water and dust protection to the application area. Over time, however, caulking compounds can dry up and crack, allowing water to seep in again.
Silicone sealants are by far the most popular leak fixing solution around the world. A major step-up from caulking compounds, silicone sealants offer immense strength and elasticity, keeping your leaks fixed for much longer periods of time. It is important that you choose the right ‘cure’, though. Acetic cure silicone sealants are anti-fungal in nature and very good for interior applications involving ceramic and glass. For exterior fixes, use a neutral cure variant that does not corrode the aluminium body of your caravan.
Polyurethane sealants, the latest in the line of caravan sealants, offer the ultimate level of protection and durability. Their increasing popularity may also be accredited to the fact that they work great with fibreglass panels, the stuff that most modern caravans are made of. Additionally, PU sealants are UV resistant, and can be sanded and painted over, unlike silicone sealants.
Leak Fixing Tips
Choosing the right sealant is important, but so is sticking to a few basics. Always ensure that you completely remove all of the old caulk or sealant in the area in question. You can use a plastic scraper for the job, which you’ll find in any hardware store. You must then clean the area and check that the surfaces are free from any kind of dust, debris or moisture. Another important measure is to allow the sealant to dry completely before painting over it. And finally, after you’re done, spray the area with some water to ensure that the leak is indeed sealed.
How to Reseal Your Hatch in Your Caravan
Where the process of resealing your caravan’s hatch stands out from other caravan resealing jobs, is in how you approach the leakage – literally. The standard method involves parking your caravan on level ground out in the open, placing a step-ladder beside it, and hositing yourself onto the caravan’s roof. However, not everybody has the luxury of a large level area right by their home (many of us have sloping driveways and yards). Also, staying balanced atop a caravan isn’t exactly a piece of cake for everybody. Which is why approaching the resealing task from inside your caravan might be a good idea. We’ll outline the process in our step-by-step guide below.
A Step-By-Step Guide To Resealing Your Caravan Hatch:
-
Place a step ladder inside your caravan, under the hatch. Climb a step or two, until you can comfortably reach the inner face of the hatch cover.
-
Pop open the rivets on the corner stakes of the hatch (located just below the hatch cover on most common hatches such as those by 4 Seasons). There should be 8 in all, 2 on each vertical face.
-
Remove all fly screens and disconnect any other equipment that may be connected to the hatch.
-
Lift the hatch cover up and away, from where you’re standing inside your caravan. Remove the flaps as well.
-
Climb another couple of steps till you’re at least a head and shoulders above the caravan roof surface, and can inspect the area surrounding the hatch.
-
Pop out the rivets or screws holding the hatch frame in place, until the frame is completely removed.
-
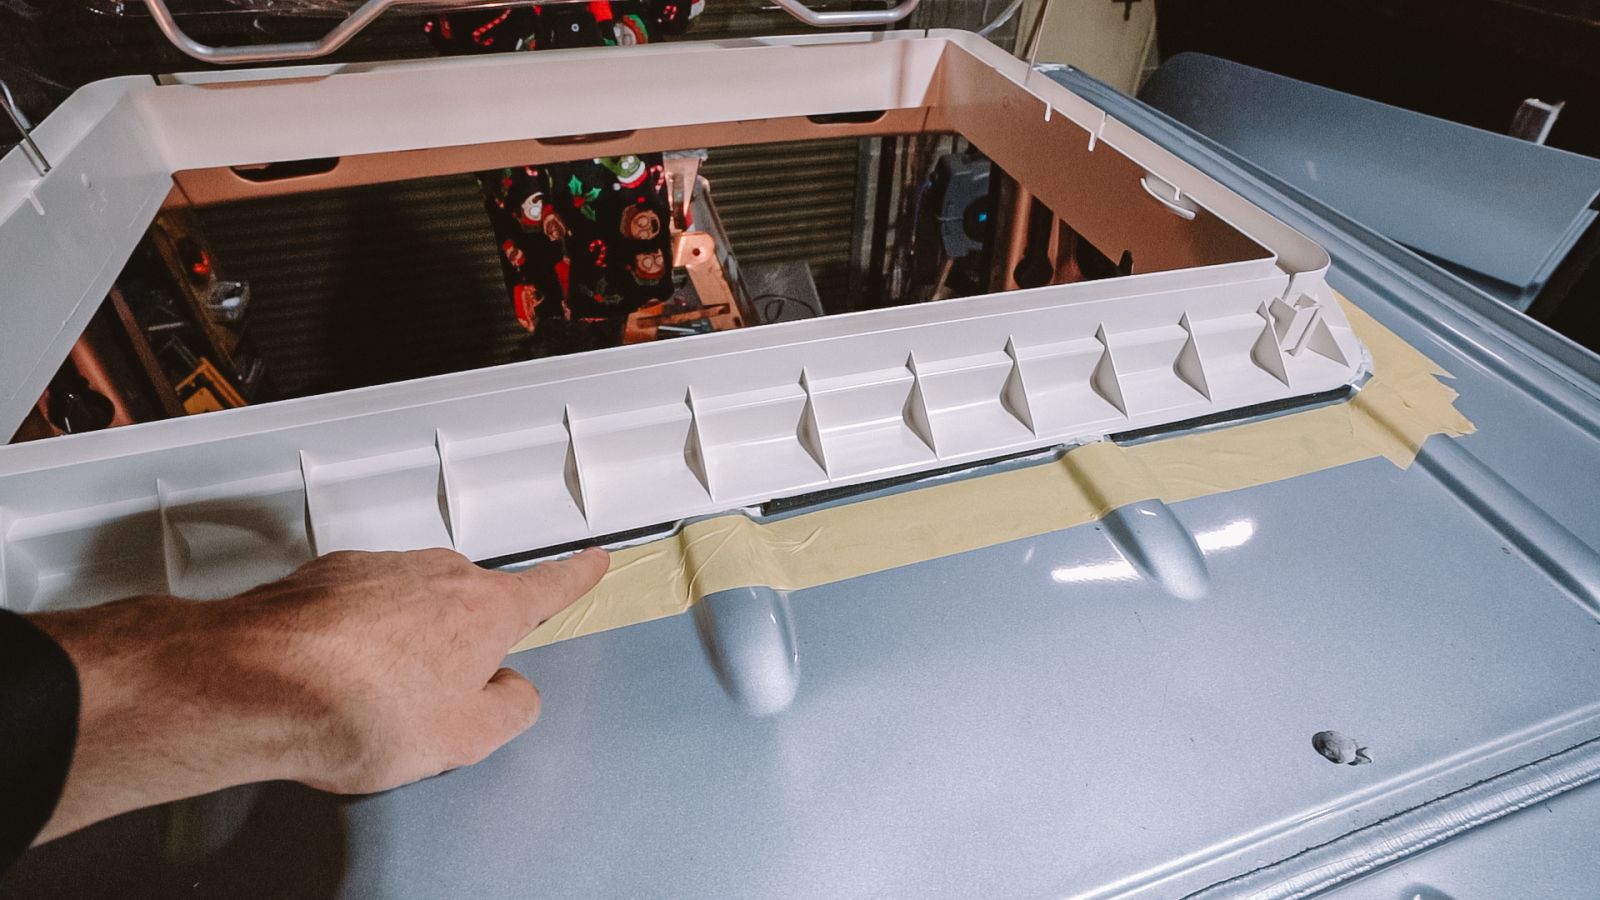
Thoroughly clean out any old caulk or sealant around the hatch base, and on the roof right where the base sits. You can take the hatch frame that you just removed to a more convenient working area (say your garage or the yard itself), and clean it there.
-
Use a rag or piece of cloth to clean the surfaces of the hatch frame, and the caravan roof area where it will sit.
-
Cleanly apply a layer of silicone sealant all around the cut out for the hatch, creating a fresh ‘bed’ for the hatch base and frame.
-
Place the hatch base or frame in place and reattach with fresh rivets or screws, as before.
-
Lower the hatch cover back on to the frame, while standing on the step-ladder inside your caravan, and reattach by means of new rivets.
Explore our full range of caravan hatches here!
FAQs
How often should I inspect caravan seals for leaks?
-
You should check your seals at least every 12–24 months, depending on how often you use your van and how harsh the climate is. Also inspect after any major event (e.g., hail, heavy storms, or after driving on rough terrain), because things like roof-mounted accessories or j‑moulds may shift
What are the most common causes of water ingress (leaks) in a caravan?
-
Aging or degraded rubber seals around windows, roof vents, and doors. Breakdown or cracking of sealants due to UV exposure or weathering
How do I know if I have internal damage (like rot) from water ingress?
-
Once you remove the fitting (e.g., window, trim), inspect the internal frame and wallboard for softness, discolouration, or decay. Use a moisture meter in suspect areas or look for signs like musty smells, bubbling walls or ceiling.
And that’s it. You’re all set to head out again for a fresh round of adventures in your newly sealed (and completely dry) caravan!
DISCLAIMER* Please note, this advice is general in nature and we strongly recommend consulting the product manual and where relevant, a professional installer.
Comments (12)
Roof leak
We’ve been away from our van, and on return, found that the bed which is under the roof hatch is wet. We’re not sure if it’s just that the black foam sealing stuff in the hatch is old and broken in places, or if there’s a bigger reason. The blind cover is wet. Should we just start by replacing the sealer foam? Or could the sealant around the hatch be the problem?By: Julie on 03 June 2024
www.caravanrvcamping.com.au Response
Hi Julie, there is nothing worse than finding a leak! You can try to replace the aged foam first and test with a bucket under the vent to catch the water, just in case. If it is still leaking then it it most certainly time to change the outer sealant.
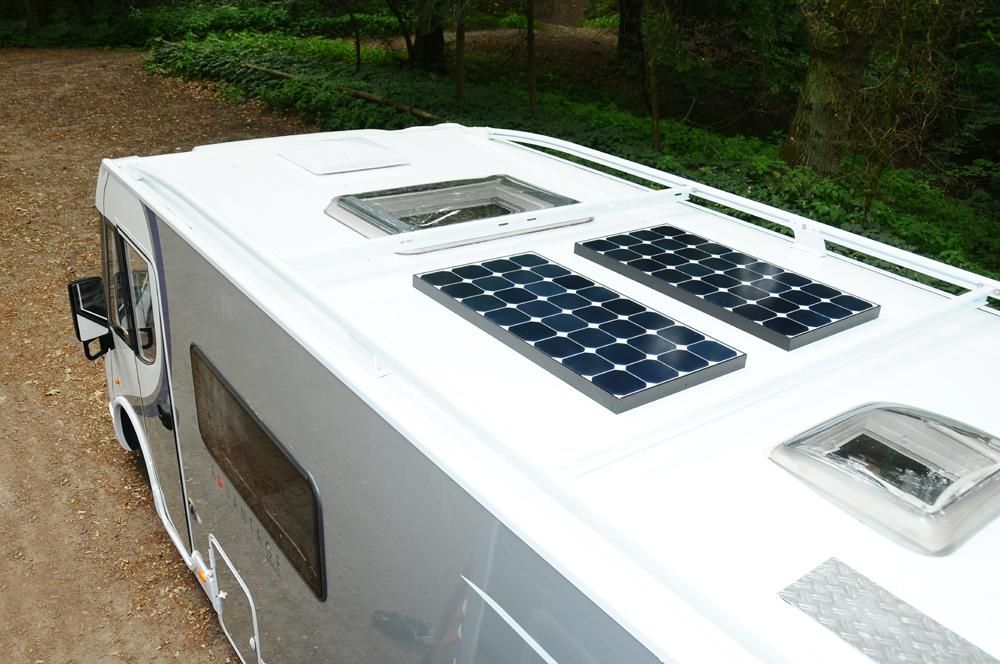
Leaking from the roof joins
The water damage has built up in my roof from an unsealed solar panel fitted on the roof, will I have to use sealant around all the joins etc on the roof and the sidings, to stop future water getting in, and redo the walls inside? It's a second hand purchased and gutted caravan,By: Bree on 15 May 2024
www.caravanrvcamping.com.au Response
Hi Brianna, remember water will always win so it is better to be safe than sorry. The more you can prevent water ingress the better
Leaking swift window
Hi, I have a 2012 swift challenger and think it's leaking from the curved top window at the front (sealant has pulled away) earliest anyone can take a look at it is August ! Would I be ok filling the crack with CT1 and cover with gorilla tape as a temporary measure till August ?By: Colin Gillyon on 05 March 2024
www.caravanrvcamping.com.au Response
Hi Colin, CT1 should be ok to use at your own risk. It is probably wise to check with the caravan repair that is looking at in August. The last thing you need is for them to spend more time removing your sealant to replace it with another.
Roof leak
Hello I’ve had my caravan set in place and the rain has caused major leaks in one corner. I can see a small part of the under roof exposed right where the end of the guttering and the roof meet. I can’t seem to see why, maybe it moved being transported but I can’t move anything to cover it. Is there a best way I can patch the gap and then seal to secure it fr the elements?By: Emy on 20 February 2024
www.caravanrvcamping.com.au Response
Hi Emy, first and foremost it is important to get the caravan inspected by a reputable caravan repair agent that can check the integrity of the body of the van. If you feel there has been movement then checking the physical structure is a must. If it is just slight movement then you can seal the gaps yourself by using the tips provided above.
Water ingress
Hi I have a hightop autotrail v-line sport and I think the leak is coming from the black seam that joins the high top roof at the rear on the vertical side what's the best way to reseal this joint looks like black sealantBy: Gerry Doherty on 12 February 2024
www.caravanrvcamping.com.au Response
Hi Gerry, Check out the FixTech Fix15 Adhesive Sealant 290ml Cartridge Black. It is a great multipurpose black sealant.
Leaking Windout caravan Awning window
Gidday i may have a leaking wing out awning window. How do I check & sealup? Our window is similar to :- Aussie Traveller Wind-out window Regards BradBy: Brad on 04 January 2024
www.caravanrvcamping.com.au Response
Hi Brad, if you are getting some water ingress it might be time to remove the existing sealant and re-seal. Depending on the type of sealant that was originally used a flat head screw driver should do the trick to carefully chisel it out, making sure you are careful not to damage the paintwork. Mineral Turpentine can be used to help remove any stubborn sealant after scraping and clean up. Once all clean of dirt and debris it is time to re-seal. Using a silicone sealant or 'sikaflex' is best as they allow greater flex than the Butyl Mastic sealants. Always use soapy water on your finger to smooth out the sealant one applied. Remember....don't leave any gaps!
Leaking caravan roof
I’ve cleaned the roof n silicone around the air vent but stil leakingBy: Amanda Wise on 25 November 2023
www.caravanrvcamping.com.au Response
Hi Amanda, you could potentially have to remove the existing silicone and re-silicone. Check out the range of silicone sealants in our Doors, Windows and Cabin Fixtures Category
Roof leak
Hi , just discovered a small leak on the roof from around the four cornered roof vent on our Jayco caravan , has anyone else had this problem if so where was their source of the leak coming from . Just purchased flex seal to try n fix the problem .By: Ian Dhue on 29 April 2023
www.caravanrvcamping.com.au Response
Hi Ian, it sounds like your sealant may have broken down over time or from movement and allowed the water to get in. You will most likely be best to strip off the existing sealant and replace it with a new one like the - FixTech Fix15 Adhesive Sealant 290ml Cartridge White
Stress cracks
Hi can anyone help need to seal and repair two small stress cracks can you tell me the best sealant to use. Many thanks NormanBy: Norman WILSON on 14 March 2023
www.caravanrvcamping.com.au Response
Hi Norman, if these are on the roof then look for a self levelling sealant such as the DICOR LAP SEALANT FOR RUBBER ROOFS 11oz CARTRIDGE 502LSW-25. 0713803. If they are on the walls then check out the DICOR LAP SEALANT 551LSW-1. 0713804
Tap run on
Our Elddis caravan just over 1 year old, kitchen tap runs on and Elddis do not care so they may say 10 year warranty but you have to get them to fix your problem on easy feat.By: Eardley Bennett on 08 March 2023
www.caravanrvcamping.com.au Response
Hi Eardley, if you can email through the brand and model number of the Tap we can do our best to assist you. Our email is sales@caravanrvcamping.com.au
My thoughts
Very helpful indeed. ThankyouBy: Esava on 22 September 2022